
A fresh coat of paint on the exterior of your house does more than improve curb appeal. It protects your home from weather, prevents damage, and adds long-term value. But exterior painting isn’t as simple as grabbing a brush and opening a can. It requires planning, preparation, and the right technique. Done right, it can last for years. Done poorly, it can peel, crack, and leave you frustrated.
This guide from Painters Colorado Spring breaks down the steps for exterior painting into a clear, step-by-step process that will help you get professional-quality results while saving time and avoiding costly mistakes.
Step 1: Inspect the Exterior
Before you begin, take a full walk around your house. Look for signs of damage such as peeling paint, rotting wood, mildew, cracks, or chalky residue. Pay special attention to areas near gutters, windows, and doors since they take the brunt of weather exposure.
Make a list of repairs that need to be addressed before painting. If you paint over damaged surfaces, the new coat will not last and may even make the problem worse.
Step 2: Wash the Surface
Paint sticks best to a clean surface. Dirt, dust, and mildew create a barrier that prevents proper adhesion. Start by washing the entire exterior with a garden hose and scrub brush. For heavily soiled or moldy areas, use a power washer or a cleaning solution made of water and mild detergent.
Take your time with this step. Allow the house to dry completely before moving forward. Depending on weather, this may take a full day or more.
Step 3: Scrape and Sand Peeling Paint
After washing, check for areas where old paint is peeling, blistering, or flaking. Use a scraper to remove loose paint. Follow with sanding to smooth rough edges and create an even surface for the new coat.
Don’t skip sanding. Even if a surface looks smooth, sanding gives the new paint something to grip, ensuring longer durability.
Step 4: Repair and Patch
Now is the time to fix any damaged surfaces. Replace rotted wood, fill cracks with exterior-grade filler, and repair loose siding. For brick or stucco, patch cracks with masonry caulk or repair compound.
Windows and doors may need caulking as well. Fresh caulk prevents water infiltration and improves energy efficiency. Allow all repairs and fillers to cure fully before painting.
Step 5: Protect Landscaping and Fixtures
Exterior painting can get messy. Protect plants, shrubs, and walkways by covering them with drop cloths. Use painter’s tape to mask around windows, trim, and light fixtures. Removing shutters and outdoor fixtures altogether will make painting easier and reduce the risk of drips or overspray.
This step may feel tedious, but careful masking and covering will save hours of cleanup later.
Step 6: Prime the Surface
Priming is one of the most critical steps in exterior painting. Primer seals porous surfaces, improves adhesion, and provides a uniform base for topcoats. If you’re painting bare wood, patched areas, or surfaces with heavy stains, primer is non-negotiable.
For previously painted surfaces in good condition, you may get away without a full coat of primer. However, spot priming any repaired areas is always a good idea.
Step 7: Choose the Right Paint
Exterior paint must withstand sun, wind, rain, and temperature changes. Choose a high-quality exterior acrylic latex paint for most surfaces. It is flexible, durable, and resistant to fading. For metal surfaces, look for paints designed to prevent rust.
Color choice is also important. Light colors reflect heat and make small houses appear larger, while darker shades add depth and sophistication. Test a few samples on different areas of your home before committing.
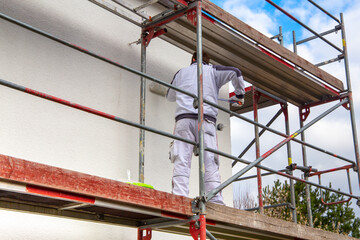
Step 8: Gather Tools and Equipment
The right tools make painting easier and faster. Here’s a basic checklist:
- Ladders or scaffolding
- Paint brushes (angled for trim, flat for broad surfaces)
- Paint rollers with extension poles
- Paint sprayer for large areas (optional but efficient)
- Drop cloths
- Painter’s tape
- Buckets and paint trays
Make sure your ladders are stable and secure. Safety should be a top priority when working at heights.
Step 9: Apply the First Coat
Start at the top of the house and work downward. This allows you to catch drips as you go. Large, flat areas like siding can be covered quickly with a roller or sprayer. Use brushes for detail work around windows, trim, and corners.
Apply paint in smooth, even strokes. Don’t overload your brush or roller, as this leads to drips and uneven coverage.
Step 10: Allow Proper Drying Time
Exterior paint requires sufficient drying time between coats. Rushing this step can trap moisture, causing bubbles and peeling later. Check the manufacturer’s instructions for drying time, but generally allow at least 4 to 6 hours in warm, dry weather. Cooler or humid conditions may require longer.
Step 11: Apply the Second Coat
The second coat enhances durability and provides even color coverage. Again, start from the top and work your way down. Maintain consistent pressure on your brush or roller to avoid streaks.
This coat locks in protection and ensures your paint job lasts longer, even under harsh weather.
Step 12: Paint Trim, Doors, and Details
Once the main surfaces are complete, move on to trim, doors, shutters, and other accents. These areas often look best with a contrasting color that highlights architectural details. Use smaller brushes for clean lines and precision.
Take your time with this step since details can make or break the overall look.
Step 13: Remove Tape and Clean Up
Before the paint fully hardens, carefully remove painter’s tape to avoid peeling off dried paint along with it. Collect drop cloths, reinstall fixtures, and dispose of empty paint cans according to local regulations.
Clean your brushes and rollers right away. Properly maintained tools will last through many projects.
Step 14: Inspect the Finished Job
After everything is dry, walk around your home and look for missed spots, thin coverage, or drips. Touch up as needed. A careful inspection ensures a flawless finish.
Step 15: Maintain Your Paint Job
A well-executed paint job should last 7 to 10 years, depending on climate and paint quality. To extend its life, wash the exterior once a year to remove dirt and mildew. Inspect for peeling or cracking, and address small problems before they grow.
Regular upkeep not only maintains appearance but also protects your home’s structure.
Final Thoughts
Exterior painting is a big project, but breaking it down into clear steps makes it manageable. Preparation, patience, and attention to detail are the difference between a paint job that lasts a season and one that lasts a decade. By following these steps, you can protect your investment, boost your home’s curb appeal, and take pride in a transformation that shows every time you pull into the driveway.